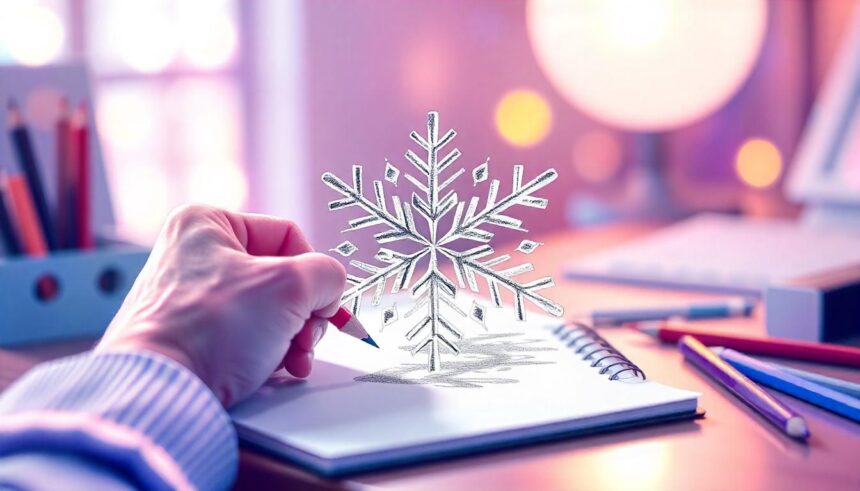
Introduction to Snowflakes
Have you ever gazed at a snowflake and marveled at its complex beauty? Each delicate flake is unique, just like the artist behind it. Drawing snowflakes can be a fun and creative way to embrace winter’s chill while expressing your artistic side. Whether you’re looking to add some frosty flair to your holiday cards or simply want to explore drawing techniques, this guide will lead you through the enchanting process of creating your own stunning snowflake designs. Grab your supplies and let’s dive into the world of intricate patterns and icy elegance!
Materials Needed for Drawing a Snowflake
To embark on your snowflake drawing journey, gather a few essential materials. A good quality sketchbook is a must. It provides the perfect surface for your creativity to unfold.
Next, choose your pencils wisely. A range of graphite pencils will help you achieve different shades and depths in your design. An eraser is also crucial for those moments when adjustments are needed.
Consider adding colored pencils or markers if you want to bring some vibrancy into your snowflakes. Blue, white, and silver can create beautiful winter vibes.
Don’t forget about a ruler! This tool helps maintain symmetry in your designs, giving each flake that delicate balance it needs.
Have some reference images handy—they can inspire unique shapes and patterns as you draw. With these materials ready, you’re set to create stunning snowflakes!
Step-by-Step Guide to Drawing a Snowflake
To start your snowflake drawing, sketch a simple six-point star. This will be the foundation of your design. Use light pencil strokes so you can easily erase any mistakes.
Next, focus on each arm of the star. Snowflakes have symmetrical patterns that radiate from the center. Keep this symmetry in mind as you add details to each point.
Now it’s time to infuse creativity into your snowflake. Experiment with different shapes—triangles, curves, or even tiny circles can enhance your design’s uniqueness.
Once you’re satisfied with the outline and details, go over your lines with a fine pen or marker to make them pop. Erase any remaining pencil marks gently for a clean finish.
If you want to add depth, consider shading parts of the snowflake lightly to give it dimension and texture. Enjoy this artistic journey!
A. Creating the Basic Shape
To kick off your snowflake drawing, start with a simple hexagon. This six-sided shape acts as the foundation for your design. Use light pencil strokes, so you can easily erase any mistakes later.
Once you have the hexagon, draw lines extending from each corner toward the center. These lines will guide the flow of your snowflake’s arms and create that iconic symmetry we all love.
Next, divide each arm into smaller sections by adding vertical or diagonal lines. This step is crucial in shaping how intricate your final design will be. Remember, every detail counts!
As you outline these segments, keep everything balanced and even on both sides. Snowflakes are known for their unique patterns but share an underlying symmetry that makes them visually appealing.
B. Adding Intricate Details
Once you have the basic shape of your snowflake, it’s time to dive into adding intricate details. This is where your creativity can really shine.
Start by focusing on the edges of each arm. You can add small points or curves to create a more organic feel. Consider including tiny loops and spirals for added dimension.
Next, think about patterns within the arms. Simple lines or dots can transform a plain design into something captivating. Experiment with symmetry; this will make your snowflake visually appealing.
Don’t forget about layering! Overlapping shapes and varying sizes will give depth to your artwork. Try mixing straight lines with soft curves for an interesting contrast.
Consider embellishing with delicate crystals or stars at the tips of each arm. These finishing touches can elevate your drawing from simple to stunning in no time!
C. Making the Design Unique
Making your snowflake design unique is where your creativity shines. Each snowflake is one of a kind, and yours should be too.
Start by experimenting with different shapes for the arms. Instead of traditional pointed tips, try rounded or jagged edges. This small tweak can create an entirely different look.
You can also play with symmetry. While classical designs are often symmetrical, don’t hesitate to break that rule. Slight variations on each side will give your art a fresh twist.
Incorporate patterns like dots or swirls within the arms of your snowflake. These added details provide depth and interest to your drawing.
Consider color choices if you’re using mixed media. Soft pastels or vibrant hues can transform the mood of your piece while keeping it distinctly yours. Embrace imperfections—after all, uniqueness lies in those little quirks!
Tips and Tricks for Perfecting Your Snowflake Drawing
To elevate your snowflake drawing, start by using a pencil for the initial sketch. This allows you to easily erase mistakes or adjust shapes as needed.
Experiment with symmetry. Snowflakes are known for their unique designs, but they often have symmetrical patterns. Use light guidelines to ensure each arm mirrors the others.
Incorporate different textures and line weights. Mixing thin and thick lines can add depth. Try stippling or cross-hatching in certain areas to create interesting visual effects.
Don’t shy away from color! While traditional snowflakes are white, adding shades of blue or silver can bring them alive on paper. Watercolors work beautifully here if you’re looking for softness.
Take breaks between drawings. Stepping back helps refresh your perspective and sparks new ideas for intricate details that enhance your art even further.
Different Styles of Snowflakes to Try
Snowflakes come in countless styles, each one a masterpiece of nature. Start with the classic six-pointed star shape. This timeless design is perfect for beginners and can easily be embellished.
Consider trying a geometric snowflake. Use sharp angles and straight lines to create an eye-catching pattern that feels modern and sleek.
For a whimsical touch, explore freeform designs. Let your creativity flow as you draw asymmetrical shapes that mimic real snowflakes’ uniqueness.
Another fun avenue is to incorporate colors or gradients into your snowflake art. Bright hues can transform ordinary white flakes into vibrant works of art.
Experiment with layering different sizes of snowflakes to add depth and dimension to your piece. Each layer creates visual interest while celebrating the beauty of winter’s wonders.
Fun Ways to Incorporate Snowflakes into Your Art
Snowflakes can add a whimsical touch to various art projects. Consider using them as stencils for unique patterns on fabric or paper. Create custom greeting cards adorned with snowflake designs for winter holidays.
For mixed media enthusiasts, try incorporating real snowflakes into your artwork. Freeze some in clear resin or use them as inspiration for delicate watercolor paintings. The translucent quality of resin beautifully captures the essence of these icy wonders.
Add dimension by crafting 3D snowflakes from paper or cardboard. Hang them from ceilings or windows to create a magical winter atmosphere indoors.
If you enjoy digital art, explore creating animated snowflake graphics. Simple software can help simulate falling flakes that dance across the screen, perfect for holiday-themed videos and social media posts.
The possibilities are endless when it comes to integrating snowflakes into your artistic endeavors! Let your creativity flow freely and experiment with different materials and techniques.
Conclusion
Drawing a snowflake can be a delightful and rewarding experience. With just a few materials and some simple steps, you can create your own unique designs that capture the beauty of winter. Remember, each snowflake is different—just like your artistic style.
Experiment with various shapes and styles to find what resonates with you. Don’t hesitate to add personal touches or try new techniques along the way. Whether you’re planning to use your snowflakes in holiday decorations or simply as an art exercise, the possibilities are endless.
So grab your pencil and paper, let your creativity flow, and enjoy every moment spent crafting these intricate winter wonders!